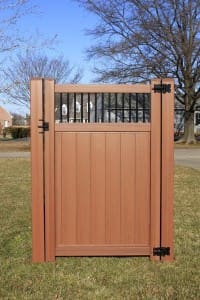
Build a Good Wooden Fence Gate
Hanging the right fence gate, the right way!
 Wow. Love what you’re doing out here, mac. Nice fence. Getting ready to add the gate? Good, good. Eh… you aren’t just going to hammer it in there, are you? You are? Oh, no reason. It’s just that the bottom of it is going to grind against the dirt, and after the first good rain, it’s going to droop and stop closing right.
Whether you’re building your fence to keep pets in, intruders out, or if you’re just setting it up so you can sunbathe without scaring the neighbors, a good, solid fence gate is crucial to the project–unless you’re planning on just hopping over the top ever time you try to get by it, you daredevil.
The first step is, of course, to put the fence gate posts into the dirt. There are two ways to do this effectively. The first method is to cement them into the ground, with a cement bridge running between both posts; this ensures that they’ll stay the same distance apart for a good, long time. It might not seem like it, but mother earth does her fair share of moving, especially during the rainy season. To make things worse, your fence, if it’s built right, will be pulling against the gate posts constantly. If you’re going for a more rustic look, you can forgo the cement bridge in favor of a timber one. The ultimate size of the fence gate opening is up to you, but remember to leave room for large tools, like lawnmowers and wheelbarrows, and if you have to pass through it before you reach your front door, remember that, sometime in the distant future, you might be purchasing something cumbersome and unwieldy, like a sofa or a piano, and that you’ll need to be able to carry it through.
To further remove the possibility of your posts creeping toward one another (or off in separate directions altogether) you can build a sturdy spacer above the gate fence as well. You can also give the fence gate a gable roof for a similar, but more visually appealing effect.
To determine the width of your fence gate, measure the space between both posts and then subtract one inch. This gives you a little breathing room on both sides of the door you’re about to add. For the door itself, you’re going to build a square frame from six pieces of timber. Four are to form the rectangle door-shape, the fifth is to go from corner to corner, diagonally, and the sixth will go across the middle, side to side. Get your measurements before you start so that you don’t make it too big or too small. Pare down some of your fence boards so that they’re a few inches shorter than the rest of the fence, and then nail them to the frame. You’ll probably have to cut or shave the last board in order for it to fit.
Now you need to hang the door onto the posts you planted; nail three T hinges to the back side of the frame of your door, and then nail the other ends to the posts. Then add a simple gate stop–a small piece of timber that prevents the fence gate from opening far enough to damage the hinges, and voila, c’est magnifique! Your fence gate is done, and you can sunbathe without receiving a cease and desist.
Now if only there were a way to provide similar protection to tree-bound squirrels and mid-flight birds…
If you’d rather have the weekend to relax Clinton Fence is happy to be your fence and gate installation company. We’ll do the job right! Call us today.
